Formatted Text Block Element
Inserting and using the Formatted Text Element.
Step 1: Work on This Page
Make sure you are in Work on This Page mode, viewing either Your Changes or All Changes.
Step 2: Insert the Formatted Text Block Element

- Choose the container that you want the Formatted Text Block element to be in.
- Click Insert new element at the bottom of the container.
- In the Element Gallery, click on Text Elements.
- Click on Formatted Text Block (without header).
Step 3: Define the Formatted Text Block Element

- The Single Image element is now inside your container.
- Click Define Formatted Text Block (without header) element at the bottom of your container.
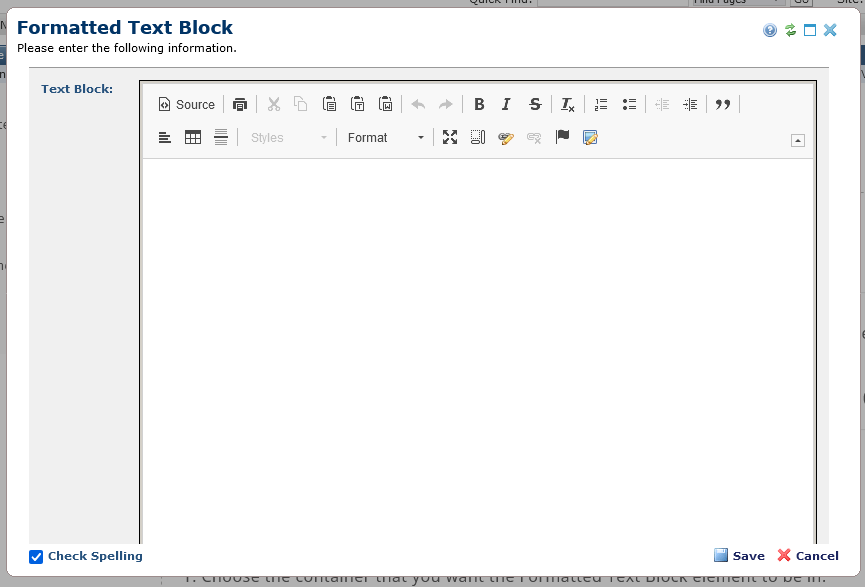
- You should now see the Formatted Text Block window, shown below.

Toolbar
The icons in the toolbar allow you to format your text, and insert things like tables, images, and links. If you hover over an icon, it's name will pop up.
Text Area
This is where you type your content.
Check Spelling
If this is checked, CommonSpot will check your spelling when you press Finish.
Step 4: Submit Your Changes
- Once you are satisfied with your formatted text, press the Finish button.
- The Formatted Text Block Element needs to be submitted before the public can see it.
Feedback is anonymous.