Creating Events and Meetings
How to create City events and meetings for the online calendar
Prerequisites
This tutorial assumes you are familiar with the following:
Overview
Contributors are able to add events and public meetings to the website's calendar. These events will show up on the sponsor organization's homepage, as well as the overall City calendar.
The City's public event calendar can be seen here: http://stlouis-mo.gov/events/.
Overview
Contributors are able to add events and public meetings to the website's calendar. These events will show up on the sponsor organization's homepage, as well as the overall City calendar.
The City's public event calendar can be seen here: http://stlouis-mo.gov/events/.
Step 1: Go to the Add Event Page
- After you've logged into CommonSpot, look for the Internal Applications link (in the blue website footer just above Log Out) and click on the link.
- Click on Calendar, Events and Meetings Admin.
- Click on Add a New Event.
Step 2: Create the Event
Fill out the form on this page to create your event/meeting.
- Meeting Type: What kind of event/meeting is this?
- Choose Community Event if you're adding a festival, open house or other non-meeting event at which the public is welcome.
- Choose Meeting if you're adding a public meeting on behalf of your department.
- Choose Aldermanic Meeting if it is a meeting of the Board of Aldermen. You will be asked to fill out more information if you select an aldermanic meeting type. Contact the web team for more information.
- Sponsor: Which department/organization is sponsoring?
- Audience: If your event is geared toward one of the audiences listed, you may choose it. If not, choose Multiple Audiences.
- Neighborhood: Selecting a neighborhood from the list results in your event appearing on that neighborhood's page. You can keep the default, City-Wide, selected if your event isn't for a specific neighborhood.
- Ward: Same as Neighborhood. Keep the Many Wards default selected if your event isn't for a specific ward.
- Keyword: Keywords ensure that events show up in filtered lists on specific pages.
Do not apply a keyword unless instructed or you have prior knowledge of which to use. - Title: Your event title.
- Spell out abbreviations.
- Be specific. "Selection Committee Meeting for Grass Cutting RFP" is a good and specific title. "Selection Committee Meeting" is not.
- You do not need to include the date or department name in the title.
- Description: What is this meeting/event about? Include zoom link if applicable.
- Start and End Date: for a one-day event, the start and end date will be the same.
- Start and end time: if an end time is not available, provide an approximate time.
- Location: Write Virtual Meeting in the location name if the event is being held online. If the event is being held in person, put the location name, street address and zip code. You do not need to include the city and state.
- Admission: Select Charge if your event has an admission fee, Free if it is free to attend.
- Admission Description: For Free events, leave the Admission Description field blank. For Charge events, put admission costs and entry info. The admission description field will NOT make links clickable, so If there is a website for ticket sales, use the Website field below.
- Contact Name: Who should be contacted about this? If they do not have a profile in the system, you can select other and type their name in.
- Phone Number: Contact phone number.
- Contact Email: What email address can people email about this?
- Contact: More contact information if applicable.
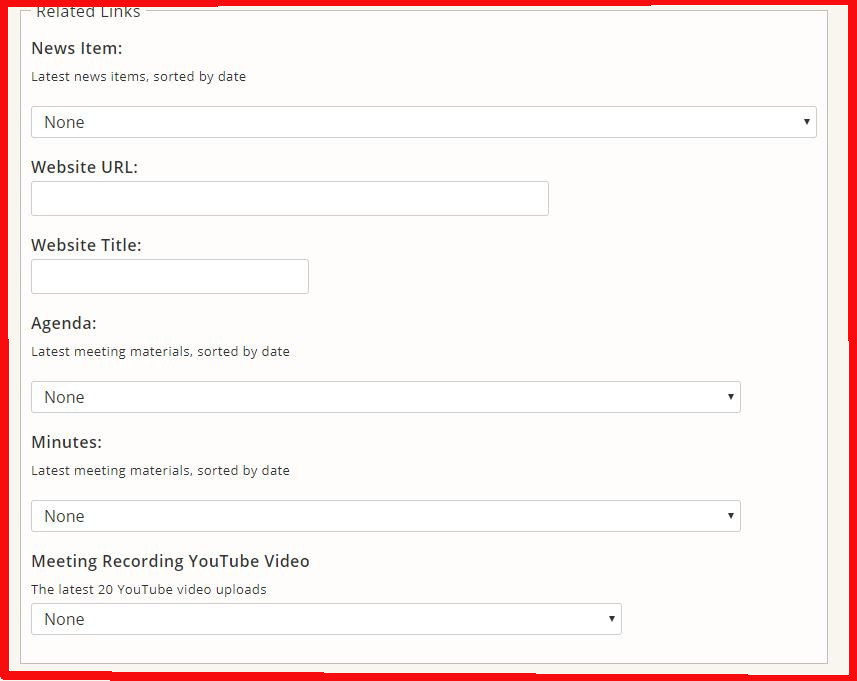
- Related Links
- News Item: if a related news item has been posted recently, you can find it in this dropdown list.
- Website URL: If the meeting/event has a website, put the full URL to the website (including http://) here.
- Website Title: The words you want people to click on to view the website.
- Agenda: If the meeting/event has a posted agenda on a page categorized as content type Meeting Materials, use the dropdown list to find that page.
- Minutes: If the meeting/event has minutes, use the drop-down selection method for minutes.
- Meeting Recording YouTube URL: If the meeting/event has a recording, use the drop-down selection method for meeting recordings.
- Accessibility: Any accessibility-related information people should be aware of, like contact information or special considerations. Departments can store default accessibility information in the Organization Element on their department homepage, which will automatically be placed in this field.
- Status: If active, it will show up on the site. If inactive, it will not.
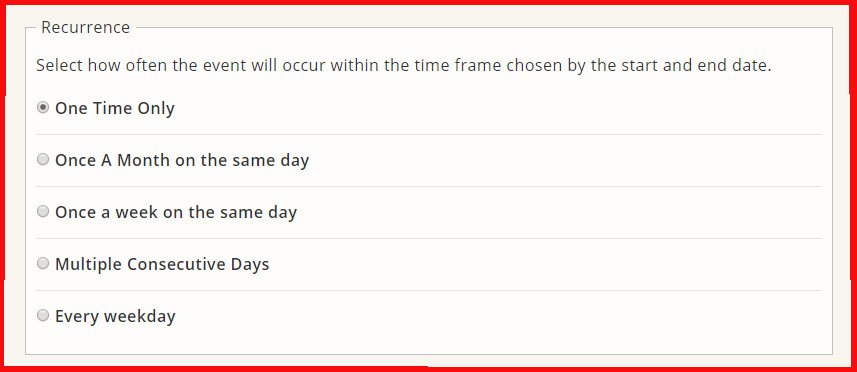
- Recurrence: Select how often the event will occur or reoccur within a time frame chosen by the start and end date.
- One Time Only
- Once A Month on the same day
- Once a week on the same day
- Multiple Consecutive Days
- Every weekday

Be very careful when adding recurring events! When you save your recurring event, it will add a separate event for each day, week or month you've selected within the range you specified. You don't want to have to deactivate dozens of events if you've made a mistake.
Step 3: Submit Your Event
- Review the form to make sure the event/meeting information is correct.
- Once you are satisfied, click on the Add Event button.
- Your event will be added to the database, and should appear in the area of your department site where meetings are listed.
