Embedding Images in Formatted Text Blocks
How to embed, format and edit images in Formatted Text Blocks
Step 1: Choose Image Placement
- When in the Formatted Text Block editor, place your cursor in the location you would like the image to appear.
- Click on the image icon in the toolbar.
![]()
Step 2: Choose the Image
Image
- If you have already uploaded your image, press Choose. Otherwise, press New and upload your image.
- You now need to search for your image in the Image Gallery.
- Enter the image's title or keywords.
- Choose a subsite to search in (if you aren't sure, choose "/" and check "Include Child Subsites" to search the whole site).
- Once you have made your filtering decisions, press Search.
- Browse through the results, and click on the image you want to use.
- Click on Use Highlighted Image.
Step 3: Image Properties
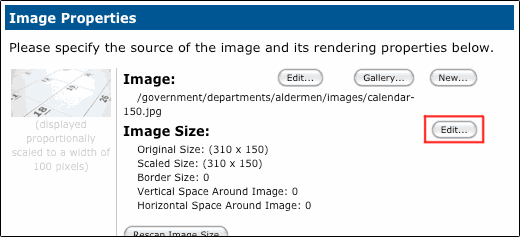
Image Size
We recommend that you resize the image before uploading it. But here you can resize the image and give it padding.

- Press Edit.
- Original Size: Displays the image at the size it was when it was uploaded.
- Custom/Advanced: Resizes the image based the height and width you provide (in pixels).
- Scale Proportionally: Enter a width OR height, not both. The other number will be calculated automatically. Use pixels, not percent.
- Border tab: Here you can give your image a border and padding.
- Border: Enter a number in pixels. Please keep the color black.
- Padding: Enter a number in pixels to give your image vertical (top and bottom) or horizontal (left and right) padding.
- Press Save to submit your changes.
Image Alignment
If you would like to have text wrap around your image, you need to change the alignment.

Selecting "Left" will have the image on the left and the text wrapping to the right.
Alternate Image Text (Flyover Text)
Alternate image text is printed in place of your image for people with visual disabilities who are using screen readers.
- Enter a brief description of the image.
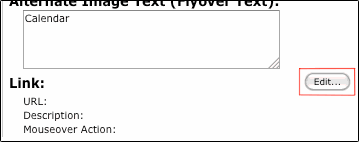
Link

- If you would like to make this image a link, press Edit.
- To link to a page within our site, or an external page, select Link to Existing Page, Uploaded Document or URL.
- Press Next.
- If this is a CommonSpot page, select CommonSpot Page, Uploaded Document or External URL and press Page Gallery.
- Choose the subsite the page you want to link to resides in.
- Click Filter.
- Click on the page you want to link to.
- Click Use Highlighted Item.
- If this is an external page, select External URL or Relative Internal URL.
- Paste in the full URL to the page.
- Press Save.
Finish Inserting the Image
- When you are satisfied with your choice, press Save.
Edit an Image in a Text Block
To edit an image in CommonSpot, do the following:
- Click on the image.
- Click on the image icon.
![]()
- Make your desired changes.
- Press okay.
Help Us Improve This Page
Did you notice an error? Is there information that you expected to find on this page, but didn't? Let us know below, and we'll work on it.
Feedback is anonymous.