Generic Documents
How to upload generic documents (all documents not having to do with procurement)
Overview
Each document, or set of documents, will have its own page. The document page gives the user an easy way of learning about the documents before downloading them.
Most documents uploaded to the site will be Generic Documents. If you want to upload a document on the site that isn't related to procurement or a Comptroller audit, make it a Generic Document.
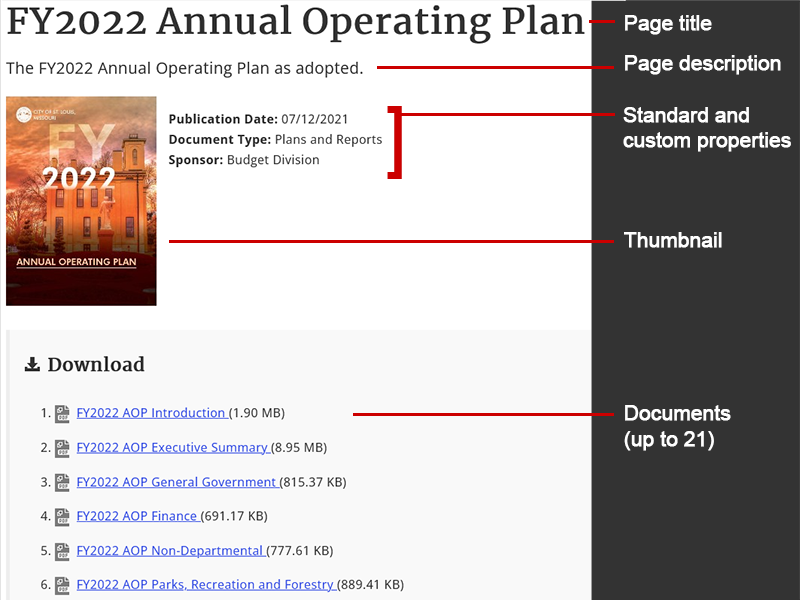
Here is an example of what your generic document page might look like:

Create or Edit
Should you edit or create a new document?
Create a new document page if:
- This document, or an older version, is not already on the website.
Learn how to create a new document page.
Edit a document page if:
- You are uploading a new version of a document already on the site.
- You are adding a document to a set of documents already on the site.
- You are changing the title, summary, or publication date.
Creating Generic Documents
Step 1: Create the Document Page

- Navigate to your documents folder.
- Log in to CommonSpot and open the toolbars.
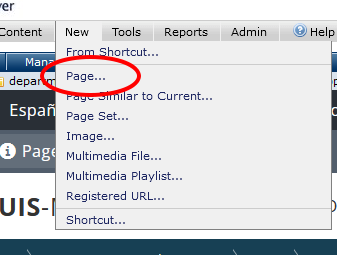
- Click on the New menu in the gray menu bar.
- Click on Page.
- Create the page as you normally would, with an exception:
-
- In the Standard Properties make sure you change the Category to Generic Documents.

- In the Standard Properties make sure you change the Category to Generic Documents.
Step 2: Fill Out the Generic Document Element
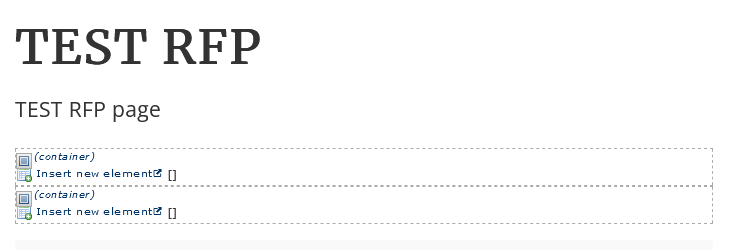
There should be a Generic Document element waiting for you on the page, like this:

If you don't see this element, go to Properties -> Standard Properties and make sure you've changed the Category to Generic Documents.
Click on the link provided to fill out the element.
- Thumbnail: If you'd like this document to have a small image, choose or upload it here. This is optional, and usually used for reports that have a cover.
-
- The image should be a maximum of 150px wide
- Summary: A brief explanation of the document(s), so people know what they are downloading.
- Document 1: This is the first, and perhaps only, document.
-
- Press the Select button.
- Choose Upload New Document and press Insert Link.
- Choose your document from your computer, and give it a title.
- Press Save.
- Document 2, Document 3, etc: You can choose up to 20 more documents. The process is the same as for Document 1.
If you have more than 21 documents, we suggest creating a second page or combining documents. - Once you are finished, press Save.
NOTE: The Document 1 slot MUST have a document in it. If you start with Document 2, or if you remove Document 1 but have other documents in 2-20, none of your documents will appear.
Editing the Document
- First, navigate to the page you would like to change.
- Next, click on the Generic Documents gear icon on the upper-left corner of the element.
- Several options will appear. Select Edit Data to access all the form fields associated with the page.

- You can edit any information previously entered in the form fields.
- Several types of edits to the documents are possible:
-
- You can replace an uploaded document with a newer version by clicking Select, then clicking the button that says Upload New Version.
- You can remove a previously uploaded document by clicking Clear.
- You can upload additional documents. The form allows for a total of 20 uploaded documents.
- Once you have completed the edits, press save.
Possible Errors
Here are some issues you may run into:
Title Already Exists
If you give a document a title that already exists in your document folder, you'll see this error:

To get around this, use a unique title for your document. Some tips:
- Add 'Document' to the end of the title.
- Add the version number to the end of the title.
- Add the date to the end of the title.
Document Element is Missing
If you created the page and there's no document element to be seen, then you likely forgot to choose the correct page category:

To fix this:
- Go to Properties in the gray toolbar
- Choose Standard
- Choose Generic Documents from the Category drop-down menu
Document Area Says [hidden]
If you've added some documents to the page, but the document area just says [hidden], this means that you didn't add a document to Document 1. Document 1 MUST be used, otherwise no documents will appear at all.